preview
For our ultimate guide to Nintendo Labo, we travelled to Amsterdam and gave everything a good first look.
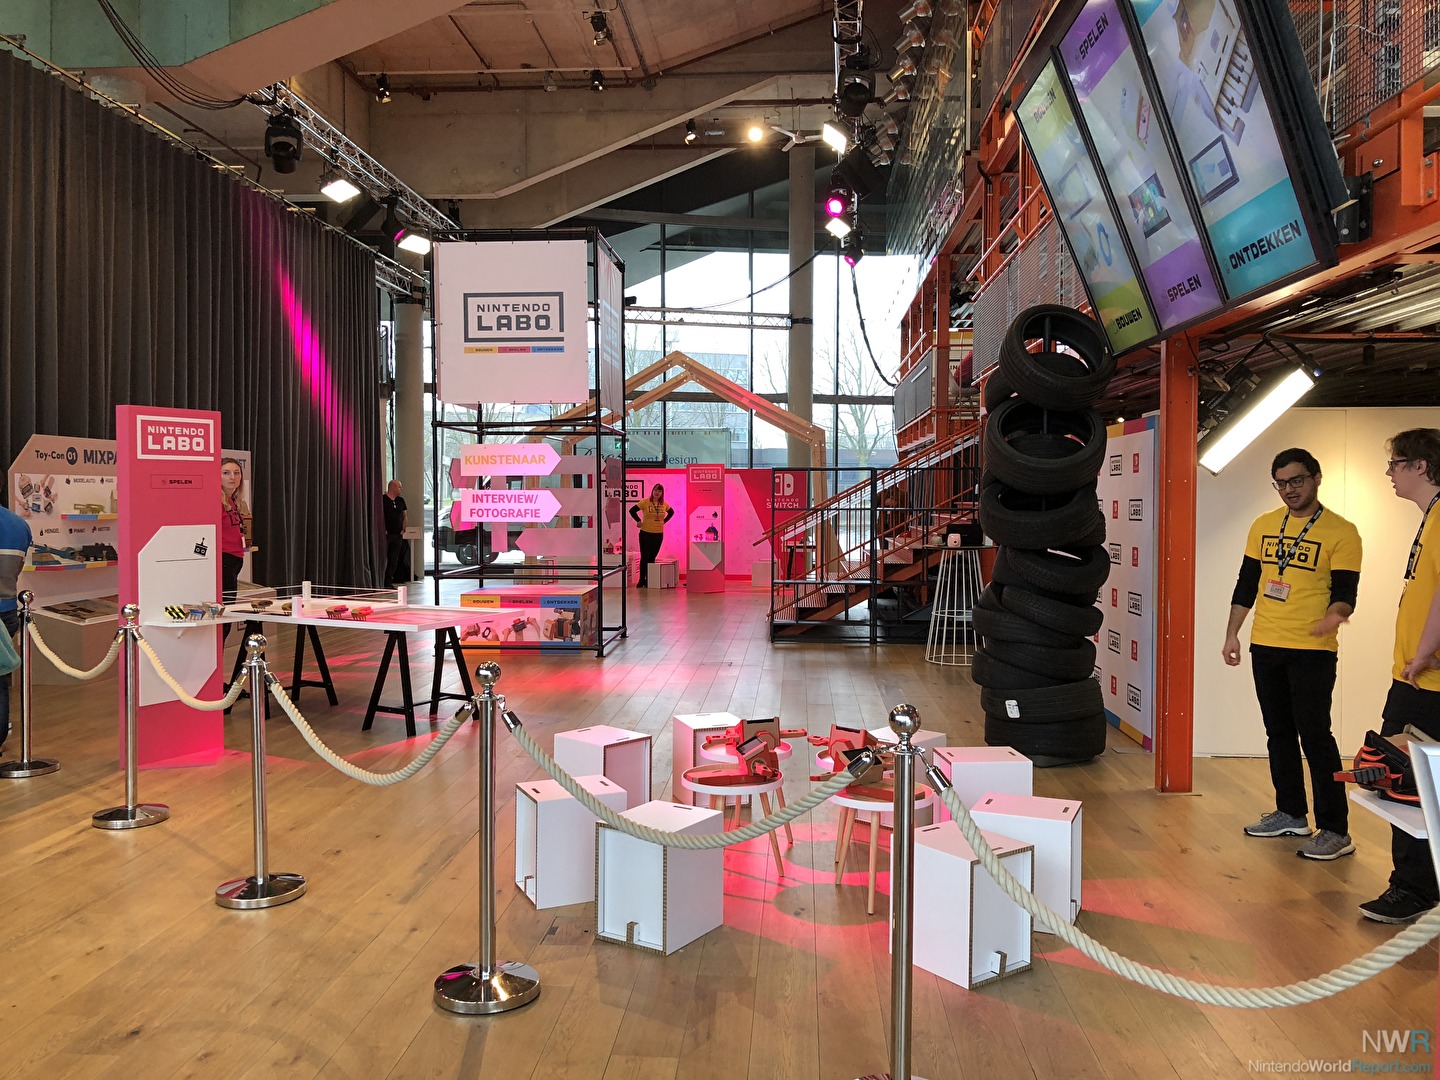
At this point, I am sure that you're aware of the Nintendo Labo. The cardboard building kits appeared out of nowhere, and will hit the scene in late April. While the initial announcement video was impressive, products can't be sold on great marketing alone. The experience is part of getting the word out and Nintendo knows this like no other company. This is why I was delighted to try out everything for the very first time in Amsterdam. Nintendo took over the meeting halls of the NEMO Science Museum, and created an interactive playground that intrigued me for about four hours.
After a short introduction to Nintendo Labo, we were tasked with building our first project. It is here that we put together the Toy-Con RC Car, which is a great way to learn how the software operates. We used one flat cardboard piece and folded in all kinds of directions to build it with ease. It becomes immediately clear how sturdy the cardboard parts are. While they aren't unbreakable, it will require some force to do so. There are clear flexible lines that allow you to bend, twist and connect certain ends together. The kit plates immediately tell you how they need to be operated, which makes it easy enough to avoid mistakes.
Despite reservations, I learned to trust the software's instructions. This is mostly came down to me being unsure how much force I should apply to the cardboard. Once I got over that hump though, I felt good about taking every step. I had the Nintendo Switch up on a stand and used the touchscreen to stay on top of the building process. You can pinch to zoom in and out, swipe different directions for a better view and hold the on screen button for the next animation. The instructions were quite interactive too and friendly to any kind of player. It tells you the next step, but lets you work at your own pace.
It took about 15 minutes for most to build the Toy-Con RC Car. Martin, a friend who came along, did it a bit quicker and without thinking about it twice. The mileage will vary on age, prior experiences, and how handy you are with some cardboard. That first project might be best to do together, just so you are ready for the bigger projects. The event gave us the option to build more, and I did end up helping with a Toy-Con House. You will notice that many layers need to fit together to get the job done. Personally I can't wait to have this at home, and spend the initial hours building everything up from scratch. That side of it is really truly exciting.
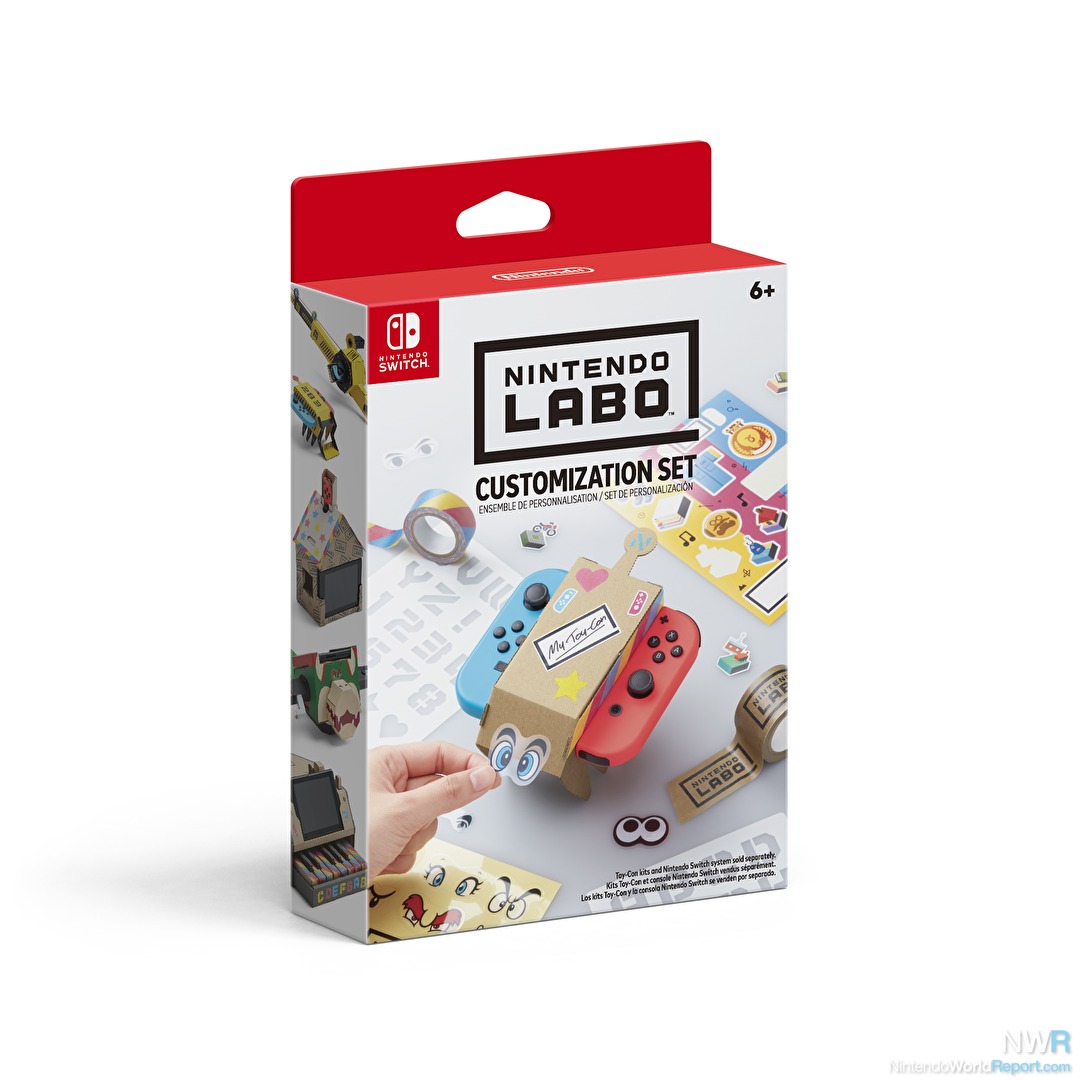
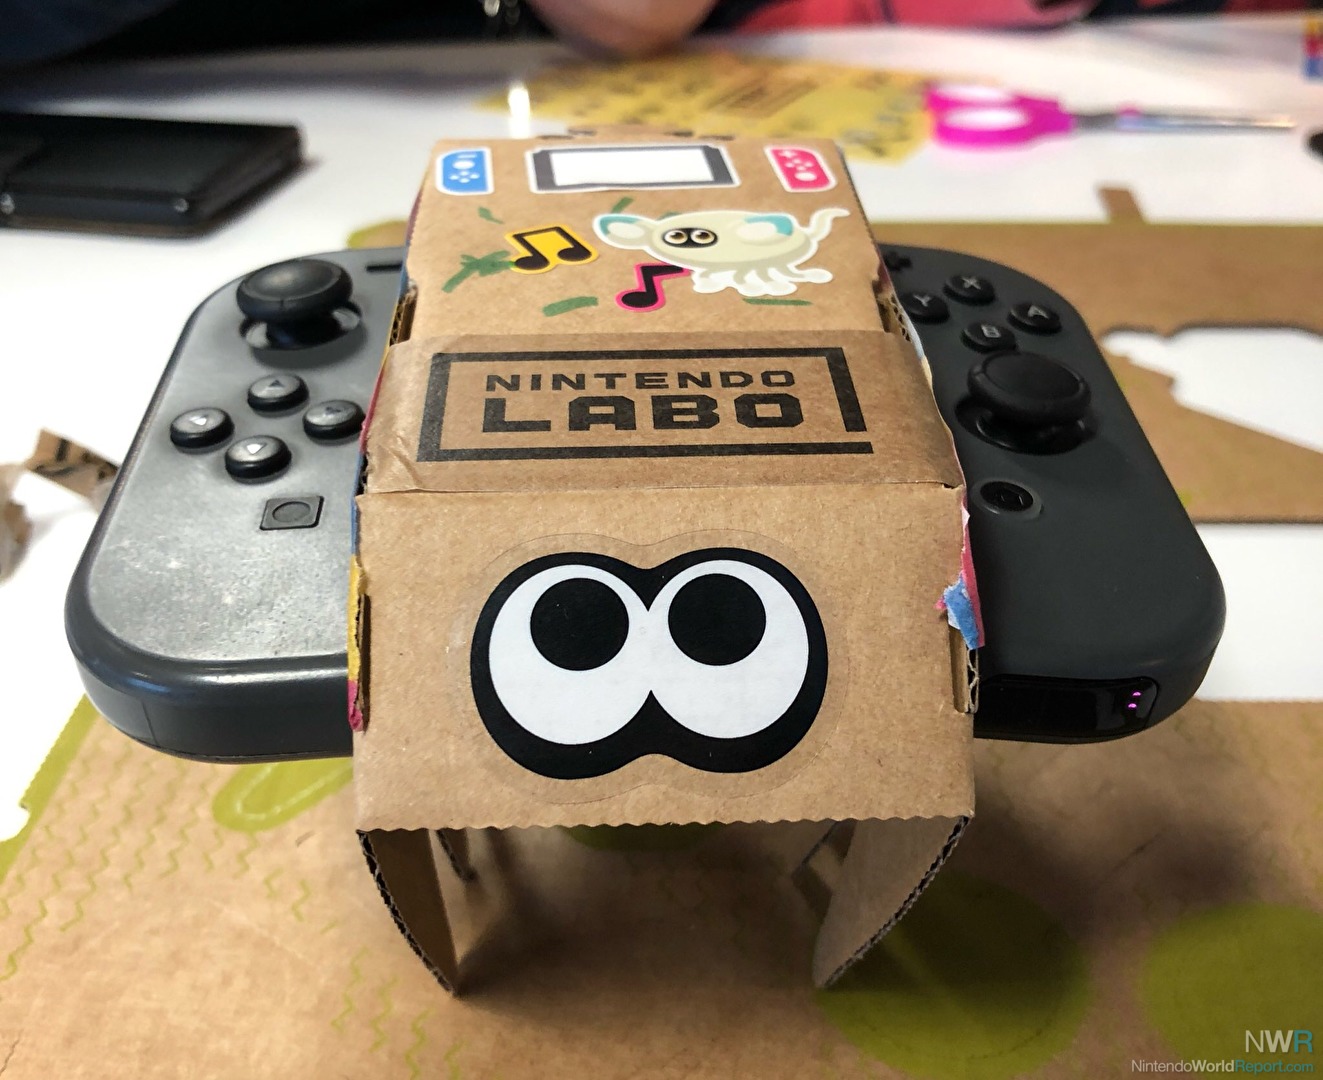
Naturally, the second part of the building process was customizing our RC car. There were pens, stencils, sparkles, googly eyes, and a lot more to plaster them with. On the Nintendo side, there were also additional parts in the RC Car kit itself with an elephant's head to make it more visually striking. There were also the tape rolls, stencils, and sticker sheets from the official Labo Customization Set. On said sticker sheets I found myself interested in the obvious: Inkling eyes and the creature from the Toy-Con house. I added some Labo tape on top, and colored tape on the sides to make it all click. A nice touch is how Nintendo will be sending us the Toy-Con RC Cars we made around the launch. It is a kind gesture that is certainly appreciated!
After the introduction to building projects, I dove in the deep end with trying the games. Surprisingly enough, they faired just as I’d imagined. With the RC Car, it is simple yet effective. You build it up, put the Joy-Con on either side and start playing on the touchscreen. The slots for the Joy-Con are really firm, which is impressive given the material used. You can press on the two buttons to steer him, and change the frequency to make adjustments to the input.
Open up the middle compartment and you are able to use the IR motion camera on the right Joy-Con. During our exploration tour, this was used to search for a Yoshi amiibo in a darkened box. I can see it being fun to make special missions or tracks in the dark, which I certainly want to give a go. The IR mode can also be put on automatic, where it will follow a certain reflection. This can be you holding reflective tape or making it so that it travels to a certain destination. All in all, it is honestly the best introduction to the world of Nintendo Labo. There were race courses set up and even a small battle arena!
Talking about race courses, let us move swiftly on to the Toy-Con Motorbike. It is here that you put the Nintendo Switch screen in the middle and the Joy-Con in both handlebars. At first, I wasn't really sure what to make of this. I mean, you are holding part of it against your body and move and steer to perform various moves. After a while, you realize how deep the mechanics are of this game. If you lean back for example, you will perform a wheelie. This is a great tactic to get ahead of your opponents, however your steering will be less effective. The biggest surprise, controls wise, is how accurate starting up is. You aren't holding a button, rather you are holding engine button and twisting your right arm downward. To win any sort of races, you will need to nail this perfectly.
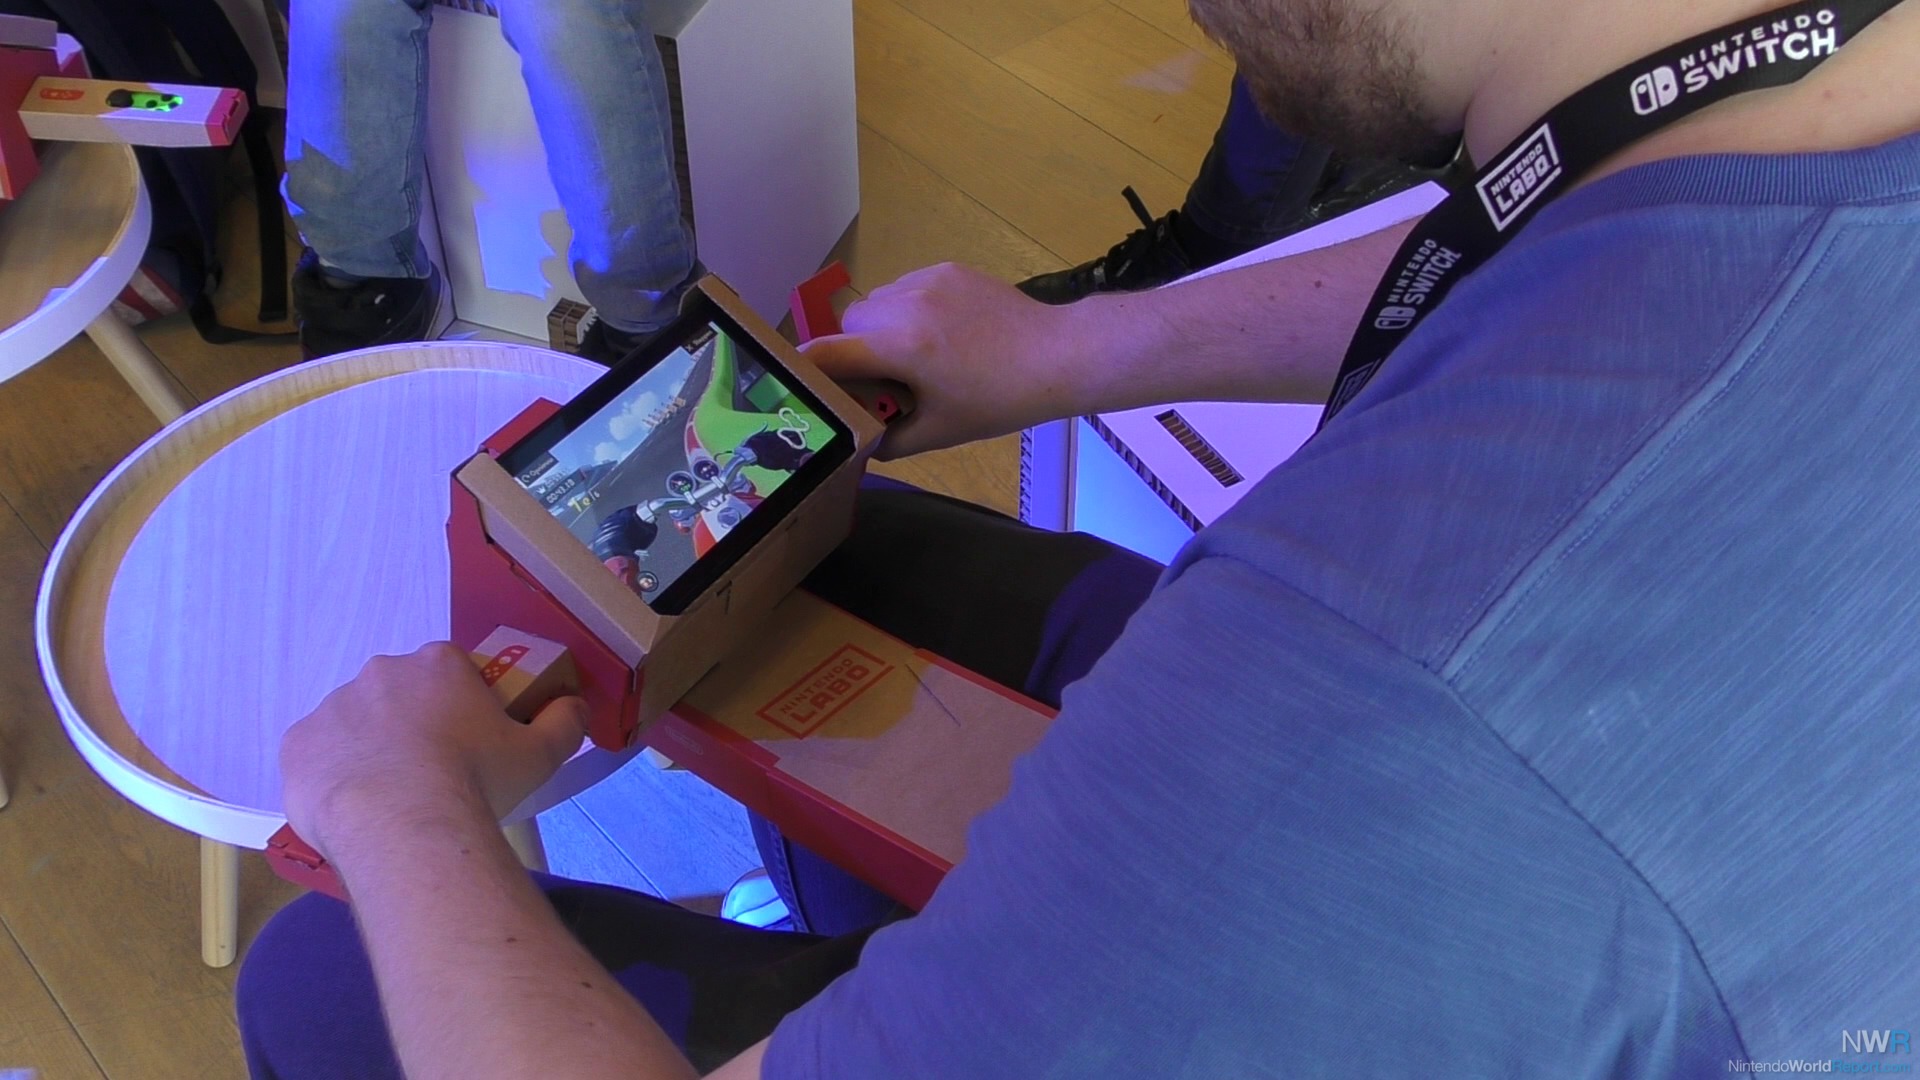
The Toy-Con Motorbike includes nine tracks out of the box. What was surprising is how neat the individual challenges were. At first, you are allowed to screw things up and find your footing. On the Advanced courses, however, there is a lot to take in. There are various obstacles, boost items and curves that will require you to drift. The last course I tried was in a star shape that forces you to time your movements and get to the point in the middle. It was over before I knew it, but I had a good time. Luckily, you are able to make your own tracks with either the included Toy-Con Mini-Bike or Scanner. You will be able to make the layout, put down objects and change the weather conditions.
The biggest build in the Variety Kit is the Toy-Con Piano. From the moment I saw it in front of me, I knew it was an incredible piece of engineering. It has the tiniest parts and elements that you need to get right. I looked at a child and father working on this project, and the work required is no joke. The reflective tape on the keys, holes for the knobs and buttons, as well as the Joy-Con placement all have to be perfect. After you get all of that done, you place the Nintendo Switch screen in the front of the Piano and start playing. It makes a strong first impression.
That impression continues when you actually start hitting the notes. The piano can actually hit various octaves to ensure that you can reach the notes you need. A quick lever on the side can change the height in an instance, which is a nice touch. The Toy-Con also offers pre-made songs that can be played with the play button, which will help you to tune it. You can also record tunes right there and then, and replay them with the record button. With these simple tools, it is easy to play songs like it was an actual piano and get a satisfying result. It is actually quite nice to push the keys, and see the console instantly respond. The whole experience was sort of magical.
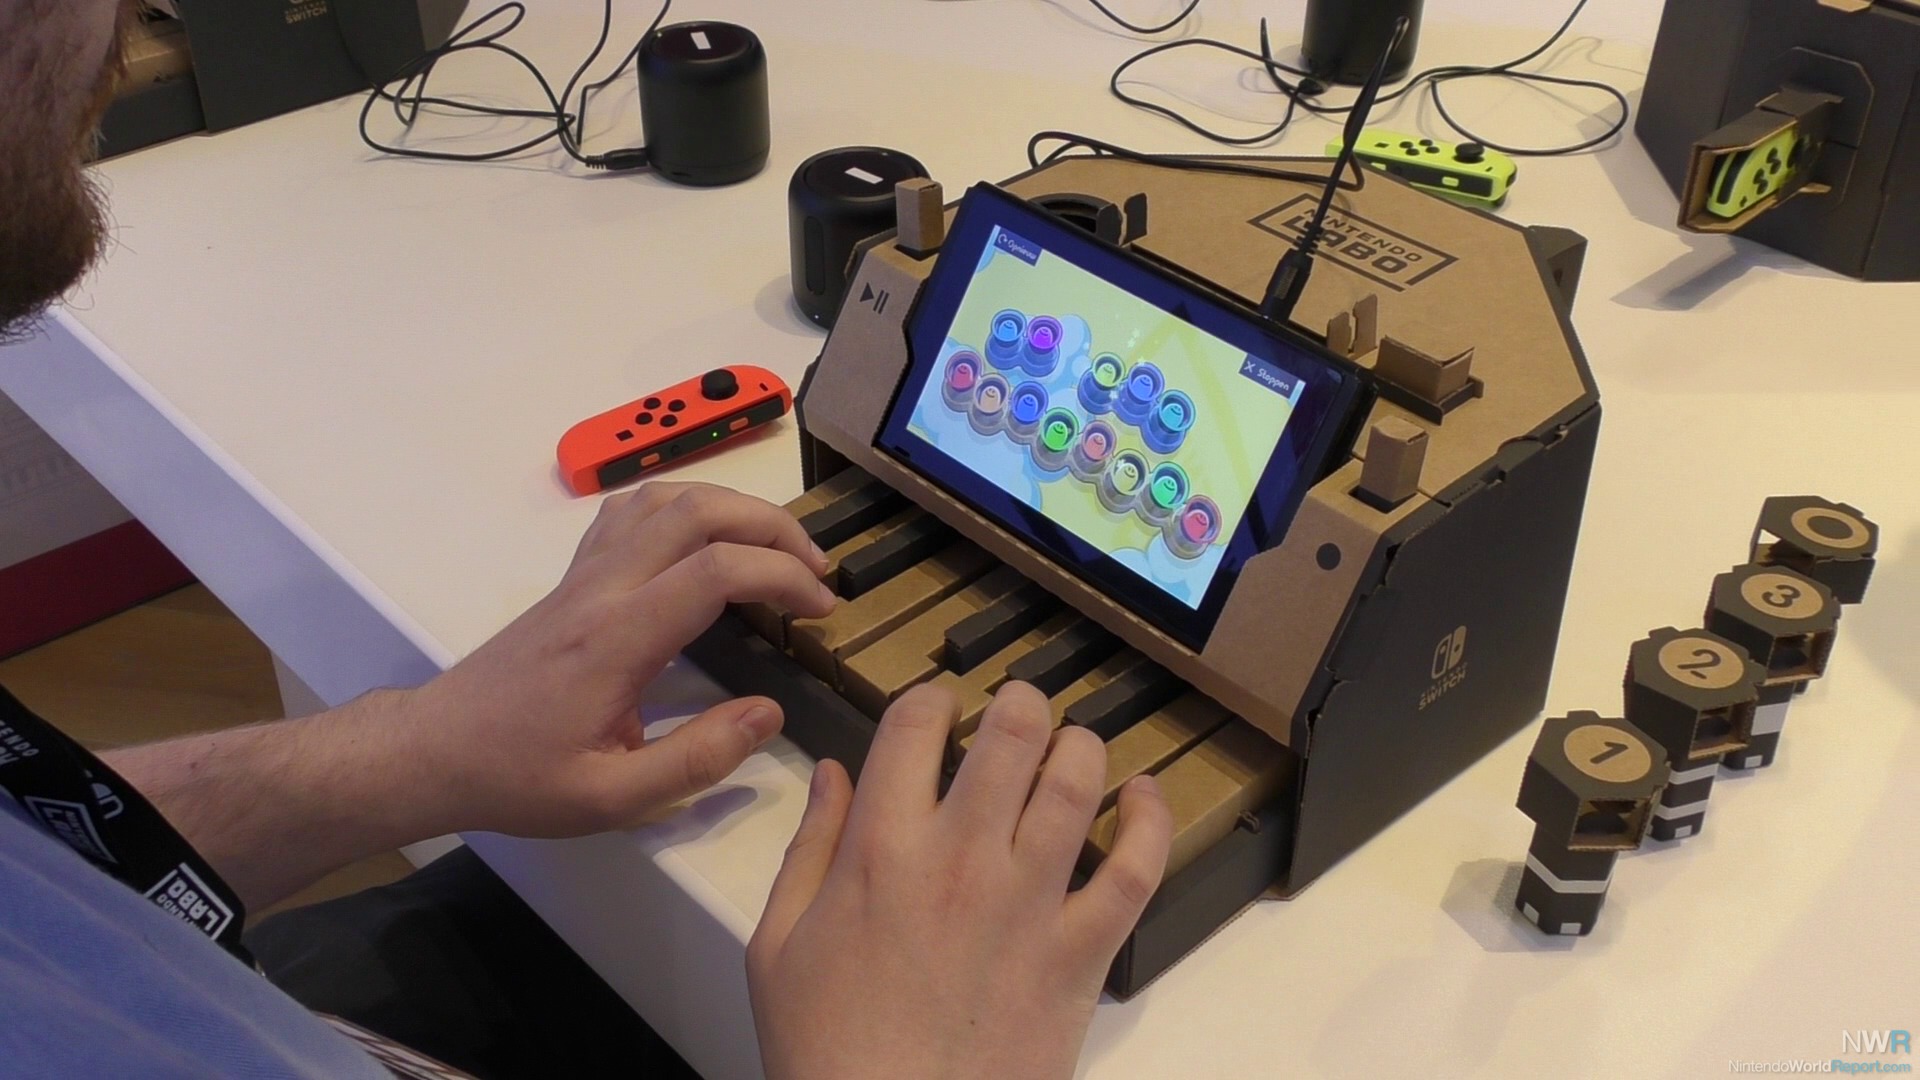
It was extra magical to use the various knobs that comes with this specific Toy-Con. By popping the numbers one to three into the left side, you get different kinds of sound. The most important one here, obviously, are the cat effects. While these critters are adorable sounding on their own, a twist on the knob allows for more echo to layer in. This was a lot of fun to screw around with, and make my friend lose his concentration. The fourth and final knob does something a little different. By hitting the keys, a Joy-Con will vibrate. You could put this controller in a box, allowing you to make extra additional sounds. With all of this, your mileage will depend on how invested you are in musical instruments. There aren't really any teaching tools present, and that is a slight bummer.
The fourth Toy-Con is the Fishing Rod. Before trying, this was the one I was the most curious about. From the initial announcement trailer, I found this the coolest thing as fishing is in the family. It turns out that my excitement for it was completely justified. When I held the finished Toy-Con in my grubby hands, it felt like a proper tool. With a Toy-Con on the left side as well as the bottom, it can sense the movements that you are making. The string that connects the rod to the screen portion almost glides into it in a way that feels organic. The connection between what you are doing plus the screen below is just really something special.
The game itself goes a lot deeper than I initially realized. You can rail the rod down as much as you like and deal with the fish that come on the screen. Once they bite on the hook, you throw the rod upwards and get the string back to the surface. That is easier said than done as the fish will fight back. It will cruise left and right, and you will have to move along with it. Depending on the type of fish you chose, it can be incredibly hard to keep it up. Next to this, bigger fish can eat smaller ones to increase the ante even further. Each fish type has various weights, sizes, and values which adds some replay value.
In combination with the Toy-Con Piano, it is possible to manage your own aquarium. It is here that you showcase your catches, observe them and see your current records. Here it is also possible to make your own fish and put them into the game. You will use a dedicated card, snip out the parts you don't need and slide it into the top of the piano. The right Joy-Con will scan it in, allowing you to further modify it. You can add colors and patterns to make it the most unique specimen on this side of the universe.
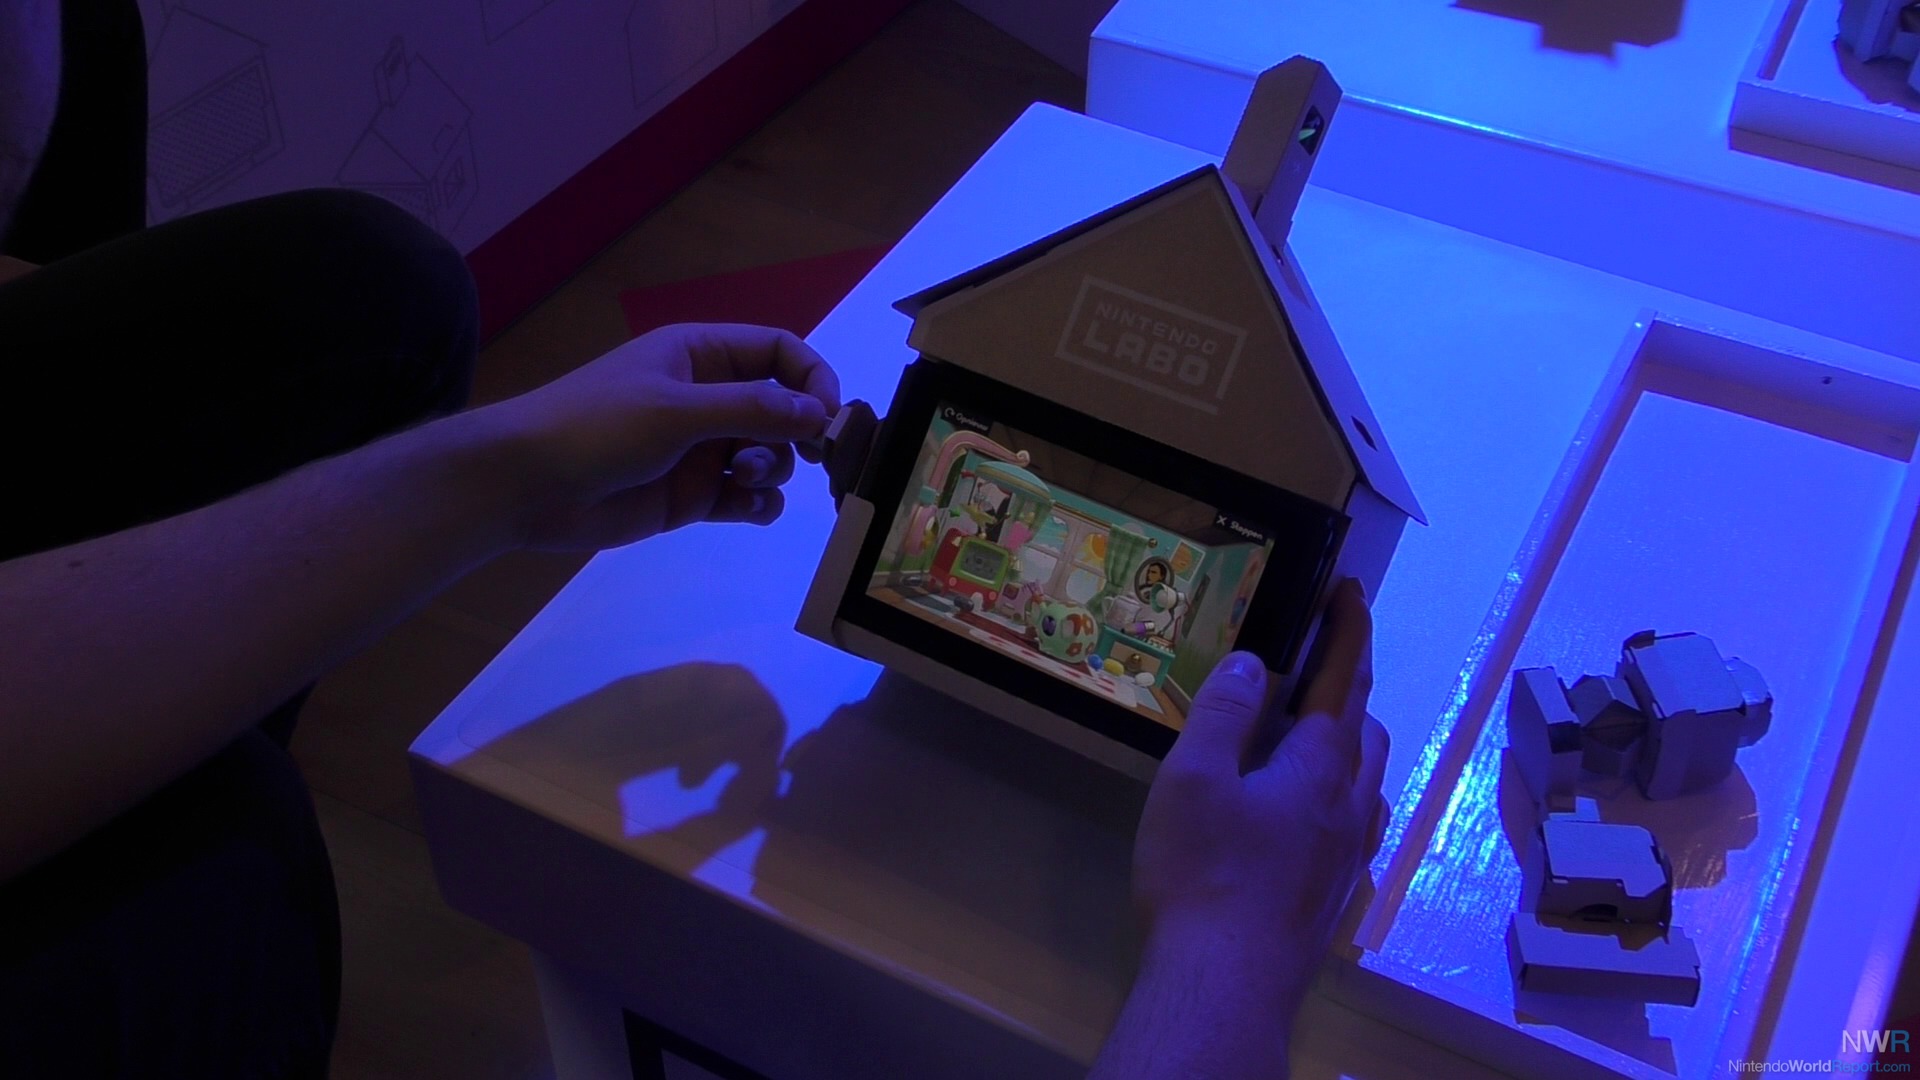
The final Variety Kit game is the Toy-Con House. Now I am not trying to be mean here, but I immediately felt that there wasn't an objective from watching videos. It was hard to wrap your head around the idea of the little creature and the activities present in the package. It wasn't until I played with it that I kind of got what they were going for. Like I said previously, building up the house takes a while. You will have to put the screen and Joy-Con in there too for good measure. You’ll also construct various knobs that you’ll place in three holes on the house.
Once you arrived at that point though, what exactly is it that you do? Well, you place the knobs into holes or move the system and a variety of things happen. Sometimes you throw in items that change how the creature behaves. You can put in a kitchen crane to fill it with water, or turn it night with a light switch. At other intervals, you will be transported to completely different areas. It is here that you will play smaller and more interactive minigames like bowling, a minecart level, or play a homage to Balloon Trip. While the ideas behind these were cute and adorable, I don't think that I will be sticking with this one for long.
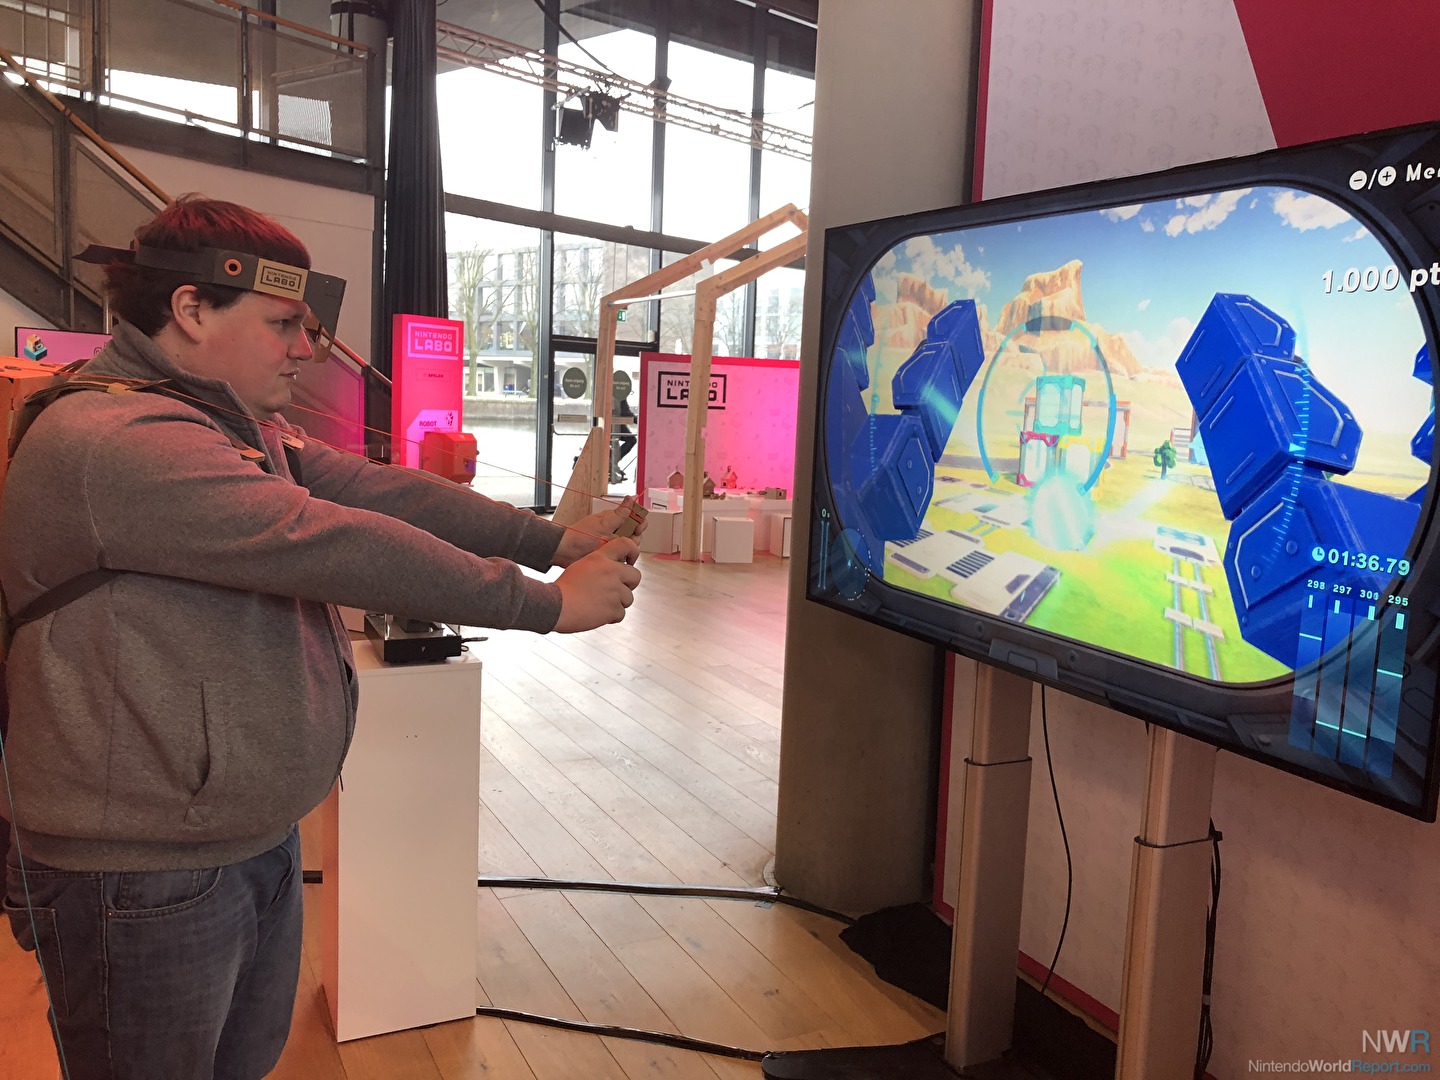
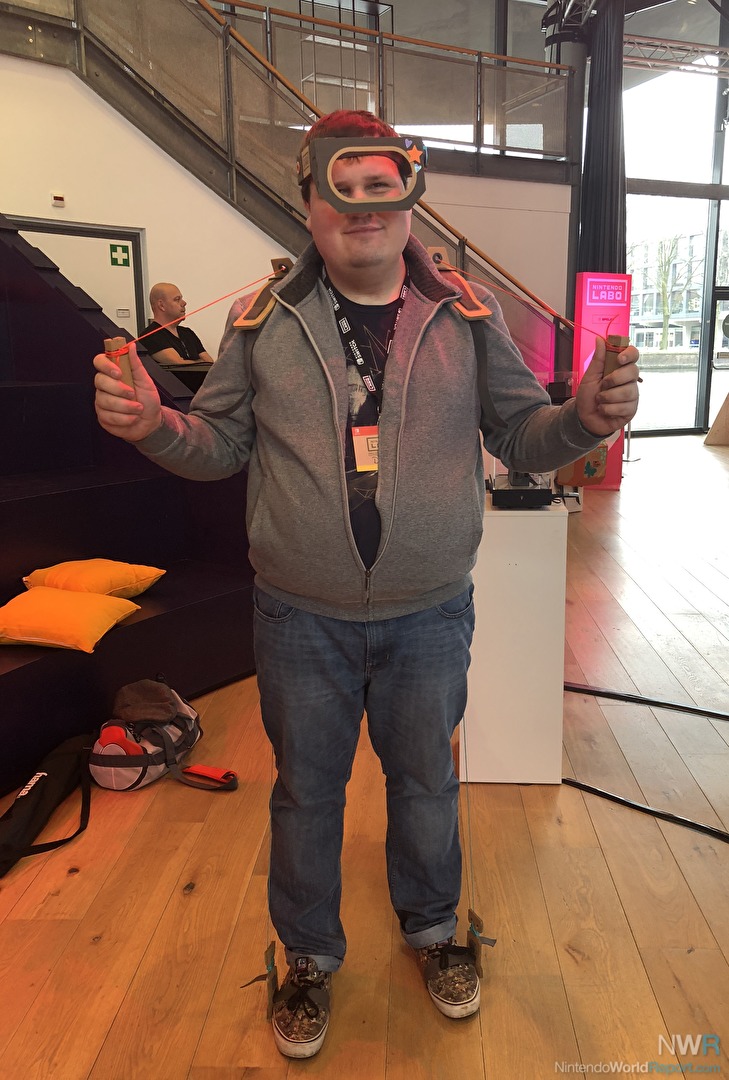
Next to the Variety Kit, we also got a look at a mission in the Robot Kit. I had a lot of reservations before trying the robot suit before going into it. Would the straps on the various parts be long enough, and would wearing it be at all tiring? Nintendo managed to put those fears to rest. As I was getting plugged in, I was told directly what I was wearing would be in the box. In that sense, the cords still had plenty of wiggle room and could've been made even longer. As for that other question, I must say that it felt rather lightweight. You will feel the backpack a little, but it isn't something you can't get used to.
As far as the mission that I played, that is where some mixed feelings truly arise. I was put into the standard timed destruction mode. It is here that you have five minutes to destroy anything in your path to score points. You will move your arms to punch and swing at buildings, UFOs, and anything else that comes along to ruin your day. While I found the destroying part quite satisfying, moving around felt sort of sluggish. You needed to make big steps to push forward and lean to change your direction. This really didn't feel natural and required a lot of getting used to. Next to that, the fastest way to move around was as the car. Crouching and turning wasn't the golden combo I hoped that it would be.
On the flipside, there is enough that I did enjoy about the whole affaire. It was exciting to put your arms behind you and just fly away. If you combine this with a downward foot stomp, the wreckage that you left behind was really cool. Another thing I adored was putting the vizor down and activating my laser attack. Not only does it look awesome in first person, you will have thrust both arms forward at the same time. It looks super silly from a distance, but performing that move cracked me up every single time honestly. After ranking up a major point total, I walked away satisfied. Naturally, I am not happy about certain elements, but we will have to see how it changes after more playing time.
The final piece of Nintendo Labo experience was exploring. Next to the fish and dark RC Car experiences I mentioned earlier, Nintendo of Europe saw fit to showcase players brand new ideas. This is where I got my first close up look at the Toy-Con Garage. This node based system removes the difficulties of programming language, and gives you access to everything the Switch and its options are capable of. It starts with easy experiments, like we saw in the announcement video. You attach a Joy-Con to the little cardboard man and experiment with how you can make him fall over. One of the things I tried was swinging the Joy-Con at him, which resulted in him naturally tumbling over.
Nintendo was very keen in showcasing how various Toy-Con projects can work together to create something special. They used the basic example of using the Motorbike to control the RC Car. You would move down to go on straight and steer left and right to go in that direction. We got to try this too and it was kind of nuts. Parents, who were also in the session, cleverly remarked how they will need extra Joy-Con to try all of this. The way that the employee approached this was going from action to reaction. He put in the nodes, showcased all the actions you used, and told us how easy it is to change with your own materials. He proposed the idea of making music with the Fishing Rod, which I really want to do now.
All in all, my first experience with Nintendo Labo was quite positive. There are questions that still linger, like the longevity of the Robot Kit, but I was impressed by how the company is handling this. It was fun to try out building the kits, playing the games, and trying things on the spot right there. The future could be bright if the Toy-Con Garage tools are truly as endless as Nintendo makes them out to be. The games themselves are, at the very least, quite enjoyable and make me excited to start building. How that ends we will know in roughly a month as that is when Nintendo Labo releases.